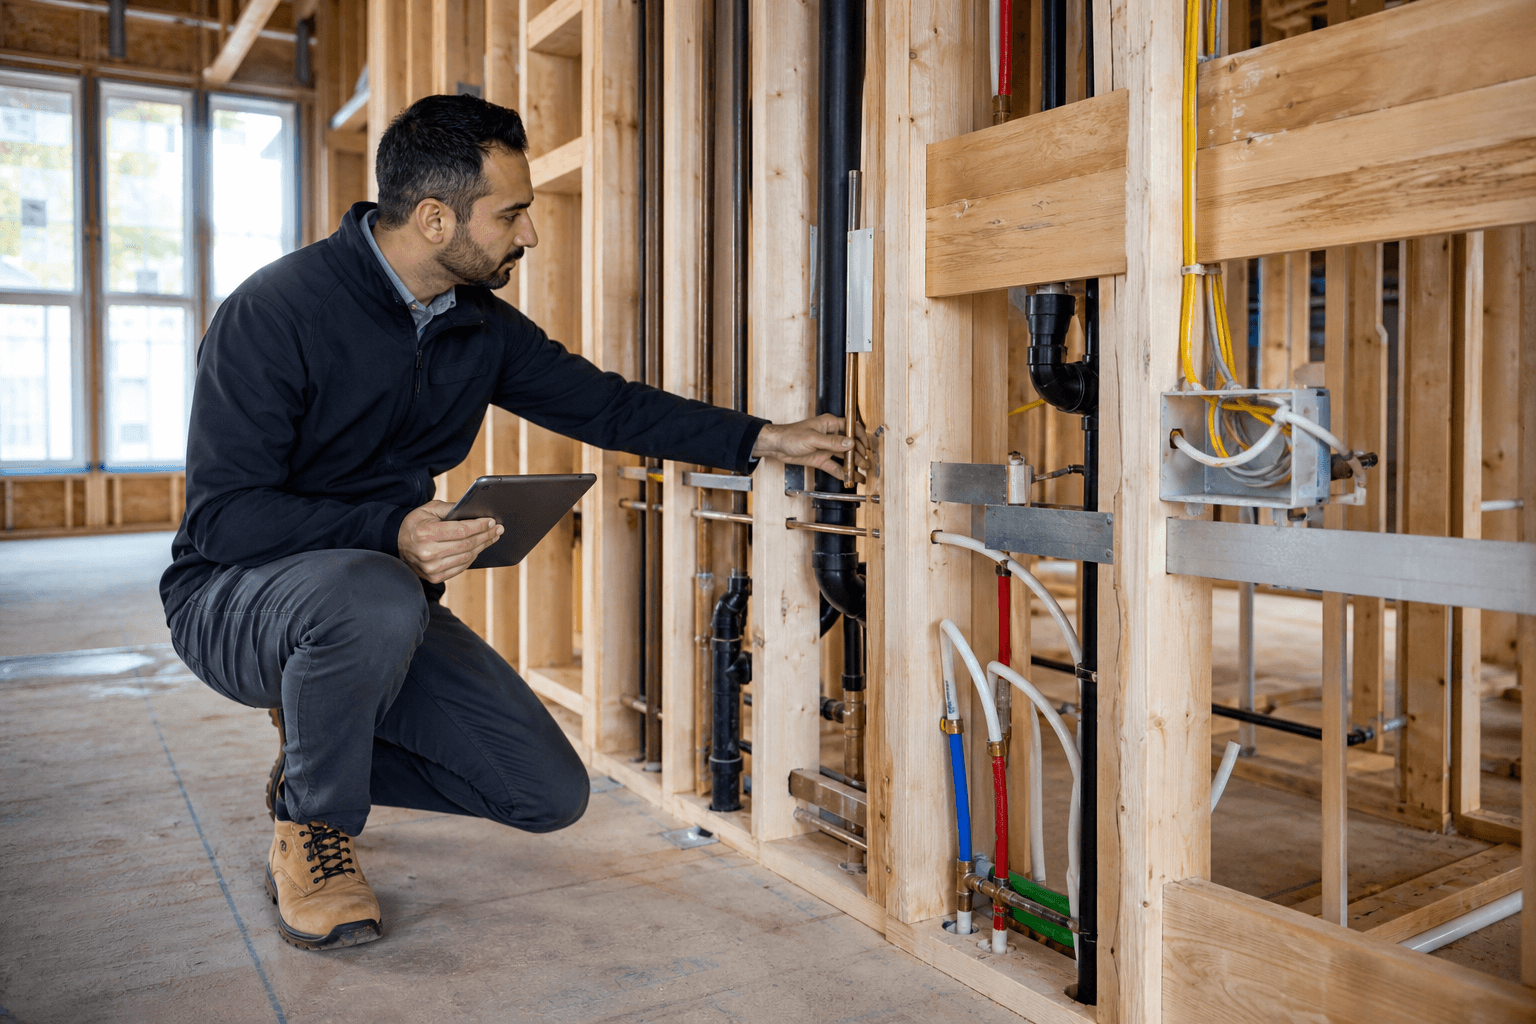
A newly built home is new, but that does not mean every installation, finish, or system is complete or trouble-free. The most useful new construction inspection checklist matches the construction stage, from exposed framing and rough-ins to the final walkthrough and an early warranty-related review.
In Ontario, the builder’s pre-delivery inspection, commonly called a PDI, is not the same as an independent inspection. The PDI records visible conditions at handover, while an independent inspector provides an objective review of visible and accessible components. Neither process verifies every concealed condition or guarantees code compliance, warranty coverage, or a particular correction outcome.
Quick summary

- Use a pre-drywall inspection to review framing, rough-ins, penetrations, drainage paths, and moisture-control details before they are concealed.
- Use the final walkthrough or PDI to check operation, finishes, safety features, visible moisture, and incomplete work before possession.
- Consider an early warranty-related review around the first year to identify developing settlement, drainage, moisture, system-performance, or finish concerns.
- Record each deficiency with its exact location, a photograph, a clear description, priority, requested correction, and follow-up status.
- Compare quotes by stage coverage, scope, report quality, turnaround, access requirements, and exclusions, not price alone.
Builder PDI vs. independent new construction inspection
A PDI is a builder-led, handover-oriented walkthrough with the purchaser. It gives you an opportunity to observe the home, identify visible deficiencies, and discuss incomplete or damaged items with the builder’s representative. Bring your purchase documents and follow the builder’s process for submitting concerns.
An independent new construction inspection is a separate service. The inspector evaluates the agreed scope without representing the builder, documents visible conditions, and explains which findings deserve prompt attention. The review may cover accessible structure, roofing, exterior, plumbing, electrical, heating, cooling, insulation, and interior components.
The two processes can complement each other. A PDI should not be treated as a substitute for independent expertise, and an independent inspection does not replace municipal inspections, builder responsibilities, or the buyer’s contractual process. For more detail on qualifications and inspection stages, review this guide to choosing a new home inspector.
Which inspection stage do you need?

The best stage depends on what is accessible and what decision you are making. Some buyers schedule one independent inspection, while others choose multiple visits so concealed work can be reviewed before it disappears behind insulation and drywall.
| Stage | Best timing | Priority checks | Main limitation |
|---|---|---|---|
| Pre-drywall | After framing and rough-ins, before insulation and drywall | Framing, penetrations, plumbing, electrical, HVAC routes, drainage, ventilation, and moisture control | Systems may be incomplete and utilities may not operate |
| Final walkthrough or PDI | When substantially complete, before possession | Operation, finishes, fixtures, safety devices, drainage, visible moisture, and incomplete work | Much structural and rough-in work is concealed |
| Early warranty-related review | Around the first year, subject to your documents and applicable process | Leaks, settlement indicators, drainage, system performance, and recurring finish problems | It cannot expose concealed defects or determine warranty eligibility |
Pre-drywall inspection checklist
A pre-drywall inspection is most useful when framing and rough-ins are visible but before insulation and drywall conceal the work. Confirm the construction status with the builder because access may be restricted until specific trades have completed their work.
- Framing and structure: Look for visible damage, unusual movement, incomplete framing, poorly supported openings, and penetrations that appear inconsistent with the intended layout. Ask the builder or an appropriate professional to clarify anything requiring plan review or technical confirmation.
- Exterior and envelope: Review visible openings, service penetrations, flashing areas, drainage paths, and transitions around windows and doors. Note conditions that could allow water to enter or drain toward the building.
- Basement and foundation: Check accessible foundation surfaces for visible cracking, staining, dampness, or water-entry indicators. A visual review cannot determine the cause or significance of every crack.
- Roof and attic preparation: Confirm that accessible roof penetrations, vent locations, insulation plans, and attic ventilation pathways are identifiable. Do not enter an unsafe construction area.
- Moisture control: Look for standing water, wet materials, staining, unprotected openings, and drainage concerns. ASM emphasizes early identification of moisture intrusion because water can contribute to structural damage and occupant safety risks.
Structure, envelope, and moisture-control checks
New construction problems are not limited to cosmetic defects. Water management deserves particular attention because a small gap, blocked drainage path, or poorly protected penetration may remain hidden after the wall assembly is closed.
Walk the accessible exterior and observe how water should move away from the building. Check visible grading, downspout discharge areas, window and door transitions, exterior penetrations, foundation walls, and material junctions. If landscaping, scaffolding, snow, stored materials, or unfinished work blocks an area, record the restriction instead of assuming the area is satisfactory.
Inside, inspect exposed framing and the basement for moisture indicators, damaged materials, and areas where services pass through the envelope. An independent inspection can document an observation, but it should not invent a cause that cannot be established visually.
Rough-in plumbing, electrical, HVAC, and safety checks
At the rough-in stage, document visible layout and workmanship concerns rather than treating incomplete systems as finished systems. Use the plans and specifications available to you, and identify differences for the builder or appropriate trade to review.
- Plumbing: Note visible pipe damage, unsupported runs, unprotected penetrations, drainage-routing concerns, and locations that do not appear to match planned fixtures. Full flow and leak testing may not yet be possible.
- Electrical: Check visible cable routing, panel location, boxes, receptacle locations, and protection around penetrations. Do not open energized equipment or perform work belonging to a licensed trade.
- Heating, cooling, and ventilation: Confirm visible duct routes, equipment locations, supply and return openings, exhaust paths, and accessible insulation. Record areas that cannot be evaluated because equipment is not installed or powered.
- Life-safety provisions: Note planned locations for smoke and carbon monoxide alarms, stair protection, guards, and handrails. Final operation may only be testable after installation and power are available.
Final walkthrough and PDI checklist
At the final stage, move through the home systematically. Start outside, then work from the upper levels down to the basement and garage. Bring a phone or camera, a notepad, and your plans or selections.
- Exterior and roof: Look for damaged cladding, incomplete sealants, blocked drainage, damaged gutters or downspouts, visible roof defects, and unfinished penetrations.
- Attic and basement: Check accessible insulation, ventilation indicators, staining, dampness, unfinished surfaces, drainage components, and signs of moisture intrusion.
- Windows and doors: Operate accessible units. Check latches, locks, screens, weatherstripping, visible damage, and binding.
- Plumbing: Run accessible fixtures, check drains, look beneath sinks, observe water flow, and inspect exposed connections for leaks.
- Electrical: Test accessible switches, lights, and receptacles through ordinary operation. Note missing covers, damaged devices, nonfunctioning fixtures, and panel-labeling concerns.
- HVAC: Confirm that heating and cooling respond when available. Check registers, returns, thermostats, and unusual moisture or noise.
- Interior finishes: Inspect walls, ceilings, floors, cabinets, counters, trim, paint, tile, and flooring transitions under suitable lighting.
- Safety and access: Check stairs, railings, guards, porches, decks, garage doors, and visible safety devices. Never enter an unsafe area to complete a checklist.
How to test, photograph, and record deficiencies
A useful deficiency record is precise enough that another person can find the issue without asking what you meant. Capture six details:
- Location: Identify the room, wall, level, fixture, or exterior elevation.
- Observation: Describe what you saw or tested without guessing at the cause.
- Photo: Take one wider image showing location and one closer image showing the condition.
- Priority: Mark whether it affects safety, moisture control, operation, completion, damage, or appearance.
- Requested correction: State the practical next step, such as repair, completion, adjustment, cleaning, or trade review.
- Follow-up status: Record who received the item, the date, and whether it remains open.
“Fix wall” is too vague. “Second-floor hallway, north wall beside the bathroom door: unfinished drywall joint visible under normal lighting; complete and refinish before possession” gives the builder a location and an actionable description. Keep copies of photographs, reports, correspondence, and updated deficiency lists.
Early warranty-related review
A review around the first year can be useful because some conditions become easier to observe after regular occupancy, heating and cooling cycles, rainfall, and seasonal changes. Look for recurring moisture, drainage problems, settlement indicators, sticking doors, HVAC concerns, plumbing leaks, and finishes that have deteriorated or repeatedly failed.
This review is not a legal determination of warranty coverage or a substitute for following the builder’s and applicable program’s reporting process. Check your documents for dates and procedures. An inspector can document visible conditions and help prioritize follow-up, but cannot guarantee that a claim will be accepted.
Access and preparation checklist
- Confirm the construction stage, permitted access, expected rough-in completion, and whether utilities will be active.
- Ask whether an escort, hard hat, safety footwear, or other site requirements apply.
- Confirm access to the attic, basement, garage, roof areas, mechanical room, electrical panel, and exterior elevations where safe.
- Provide plans, specifications, upgrade selections, appliance information, and previous deficiency lists.
- Arrange keys, codes, parking, lighting, and enough time for a systematic review.
- Ask when the report will arrive, what format it uses, and whether follow-up questions are included.
What a new construction inspection cannot confirm
Most residential inspections are visual and non-destructive. They generally address visible and accessible components within the agreed scope, not every concealed connection, buried drain, covered wall, foundation condition, or specialist system.
Incomplete utilities may prevent testing, while restricted access may leave parts of the roof, attic, mechanical systems, or exterior unreviewed. An inspection report documents observations and limitations. It is not an engineering opinion, municipal approval, code-compliance certificate, or guarantee that no defect exists.
How to compare new construction inspection quotes
Before comparing price, compare what each proposal includes. House inspection cost can change with property type, scope, reporting, and the number of phases, so a lower quote may cover fewer visits or systems.
| Question | Why it matters |
|---|---|
| How many visits are included? | Pre-drywall and final reviews answer different questions. |
| What components are in scope? | Confirm coverage for structure, envelope, roof, attic, plumbing, electrical, HVAC, interiors, and moisture observations. |
| What access or testing is excluded? | Understand limits caused by unfinished work, unsafe areas, inactive utilities, or concealed components. |
| What report will I receive? | Look for locations, photographs, priorities, limitations, and practical next steps. |
| When is the report delivered? | Prompt documentation helps when builder discussions or possession decisions are time-sensitive. |
| What credentials and experience apply? | Ask how the inspector’s training fits residential new construction. |
Why the report format and turnaround matter
A report should help you move from observation to action. Photos, exact locations, prioritized findings, and clear limitations make it easier to communicate with a builder, agent, trade, or property manager than a collection of unlabelled phone pictures.
ASM states that its residential and new construction inspections include same-day PDF reporting. That turnaround can help organize deficiencies quickly, but it does not guarantee a builder response, repair, closing change, or warranty result.
Frequently asked questions
Does a newly built home really need an independent inspection?
It can be valuable because new construction may contain workmanship, moisture-control, system-performance, or finish issues. An independent inspection adds a separate review of visible and accessible conditions, while the builder’s PDI remains part of handover.
What does a pre-drywall inspection check?
It checks accessible framing, penetrations, rough-in plumbing, electrical and HVAC routing, drainage paths, ventilation preparation, and visible moisture or workmanship concerns before insulation and drywall conceal them.
What should I look for during a final walkthrough or PDI?
Check windows, doors, fixtures, drains, switches, lights, HVAC controls, safety devices, stairs, railings, finishes, basement and attic areas, exterior drainage, and visible moisture. Photograph and locate each deficiency.
Should I schedule an inspection around 11 months after possession?
An early warranty-related review can identify developing settlement, leaks, drainage concerns, system-performance problems, and recurring finish defects. Review your documents for applicable dates and reporting procedures.
Does a new construction inspection prove that the home meets code?
No. An independent inspection is generally a visual review of accessible conditions, not a municipal inspection, engineering certification, or guarantee of code compliance.
Make the checklist match the stage
The most useful new construction inspection checklist is not one long list used at every visit. Identify whether the home is at the pre-drywall, final walkthrough or PDI, or early warranty-related stage. Then confirm access, utilities, scope, and reporting before the appointment.
Record precise locations and photographs, separate observations from assumptions, and track each item through follow-up. If you need a GTA new construction inspection with a same-day PDF report, Asmhomeinspection provides certified residential inspection services across Toronto and the GTA.